Shopify: How to Add Subheading to Product Page
You can add extra information to your products through the use of metafields. Metafields allow you to have extra fields on the objects in your Shopify store. To add metafields, there are lots of different apps with varying amounts of functionality. For something simple like this, you can just use one of the free apps such as Advanced Custom Fields.
Installing & Setting up your Metafields App
Go to the app store and install Advanced Custom Fields
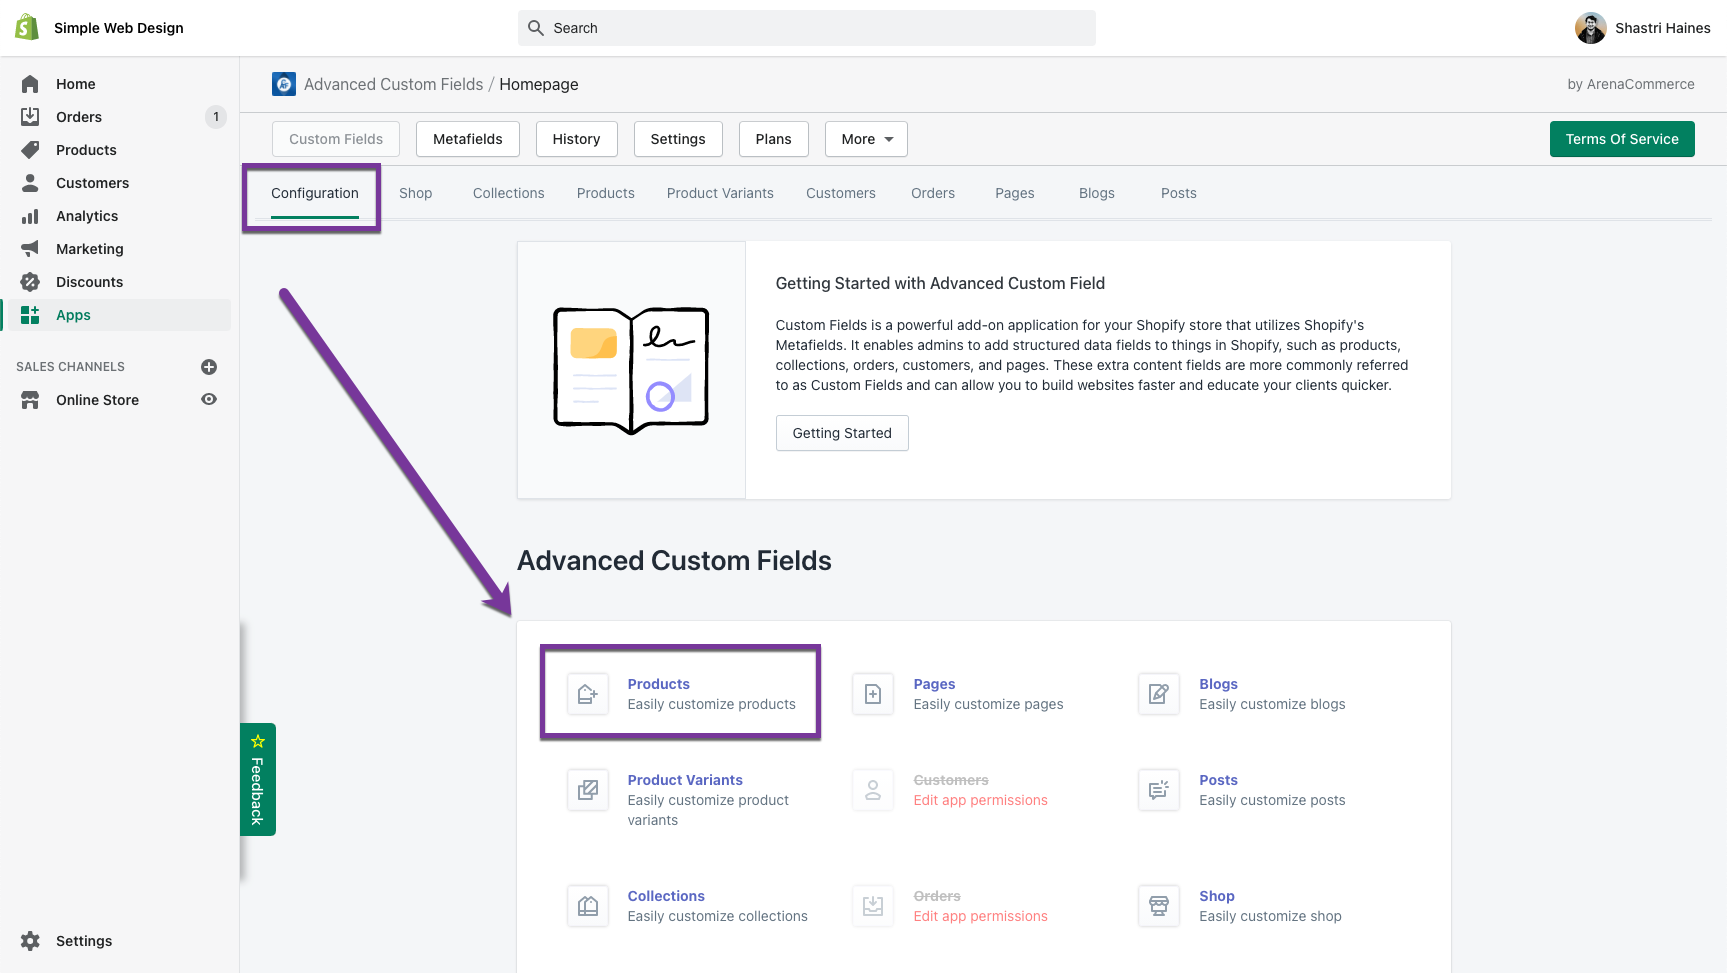
Accept the privacy policy and click on ‘Products’ in the Configuration screen
Now on the next screen we’re going to drag the HTML block into the ‘Product Fields’ section.
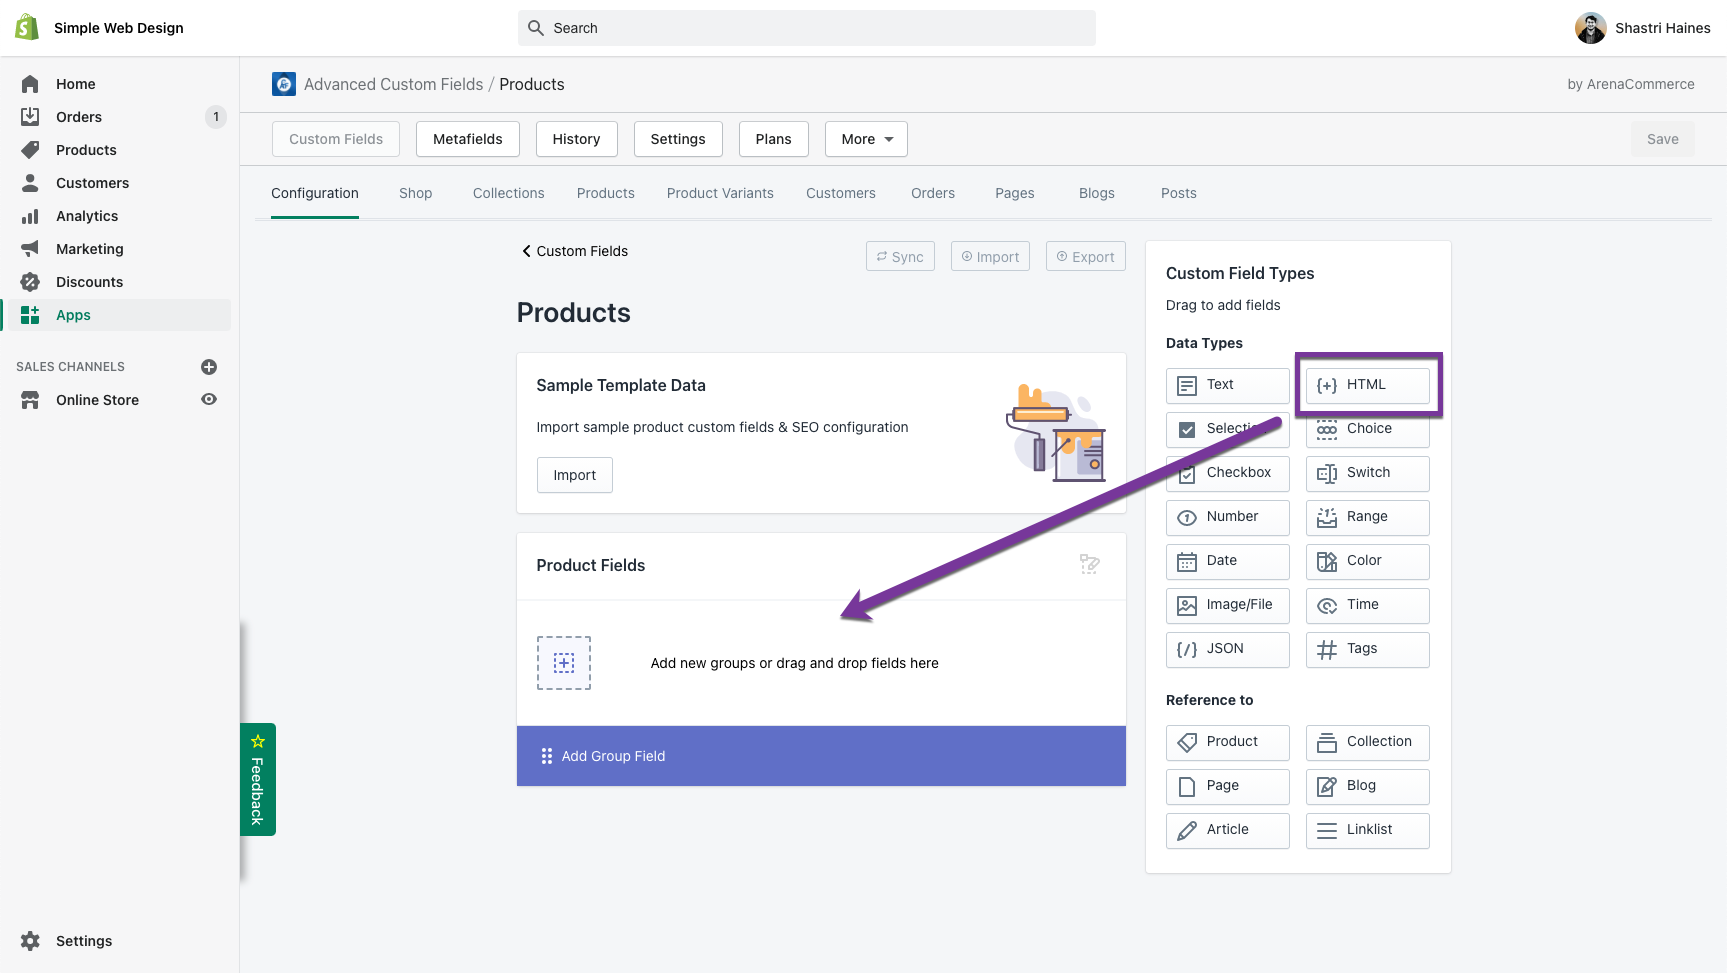
Once that is done, you will have a pop-up. Enter the information into the pop-up as below.

Namespace: subheading
Key: swd
Label: Enter the subheading for the product
Instructions: You can use HTML in this section such as <b>bold</b> to bold text.
Press ‘Done’ and then ‘Save’ once finished.
Adding the Subheading to Your Product
Now that we have our app setup, we can navigate to a product and add the subheading to it. Each product can have a unique heading and needs to be managed individually.
Go back to the metafields app and click on ‘Products’ in the top navigation, and then into one of your products.

Once in there, you can enter your text and add some formatting using the in-built toolbar.
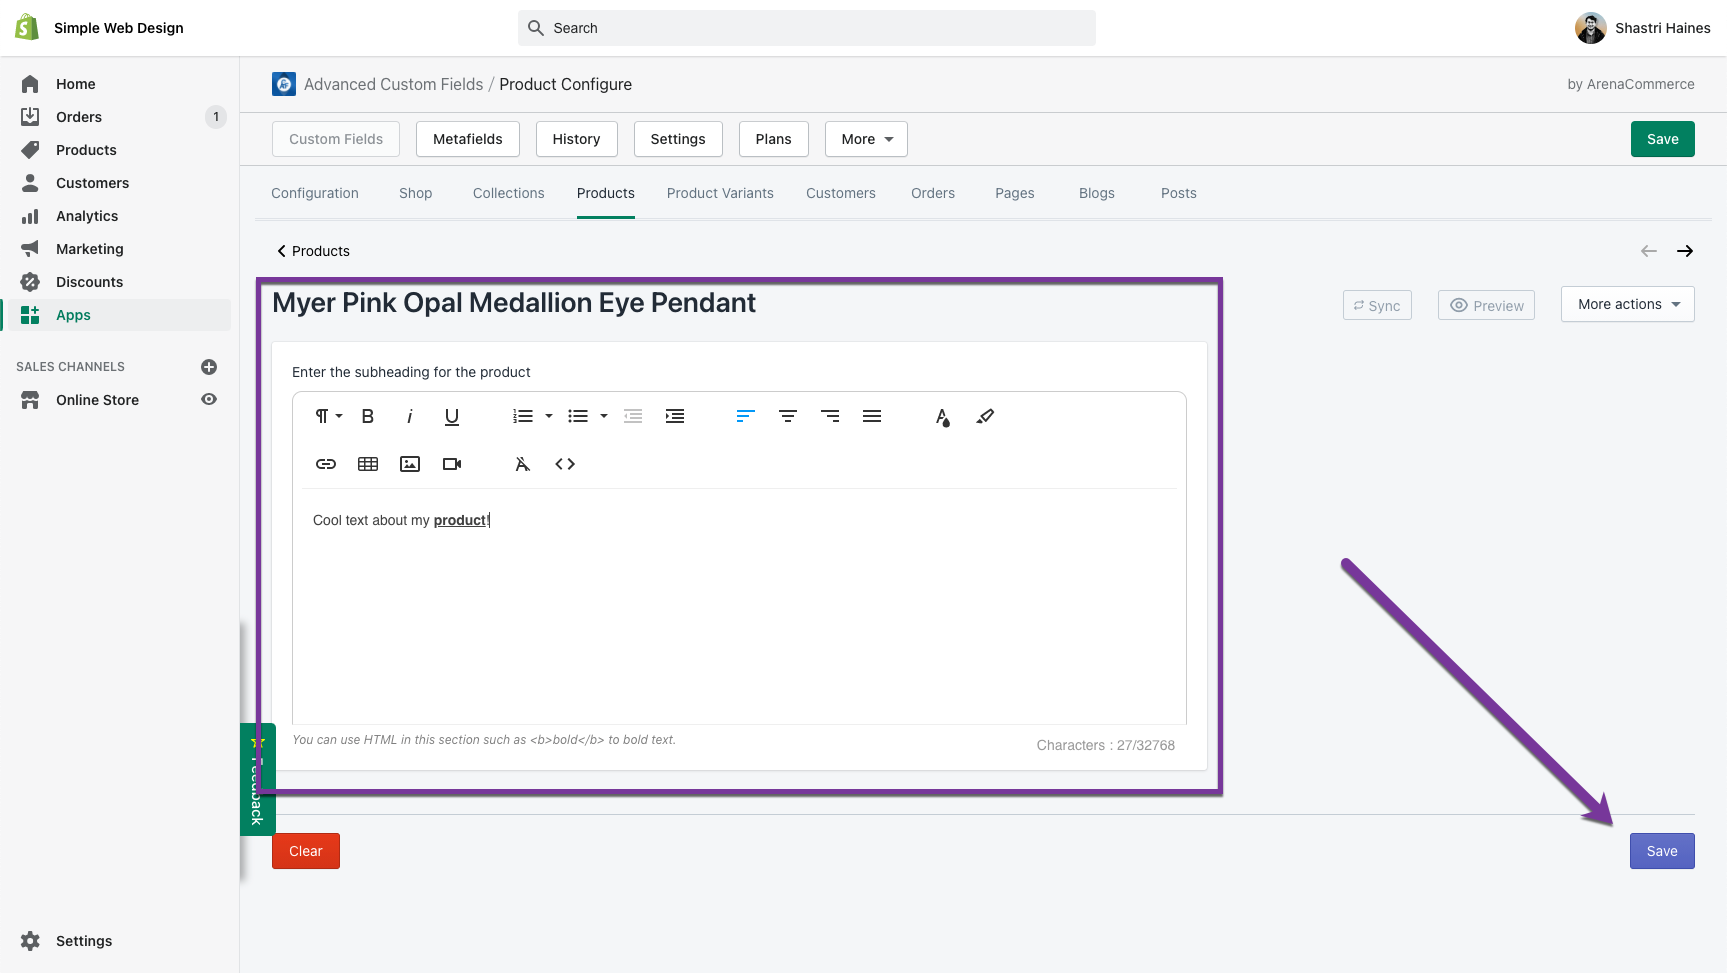
Press ‘Save’ once finished. You have now successfully added the metafield data to your product.
Getting the Subheading to Display on the Product Page
The last step we have is adding the code to the product page that will display the value in the metafield for that product. This example is for the ‘Debut’ theme but can be modified to work for any theme.
Click Actions -> Edit Code next to your theme.
Search for ‘product-template’ and it should show you one file.
Click into that file and search for ‘product-single__title’, it should be on line 137 (depending on whether or not you have made other customisations to this file).
You should see the line:
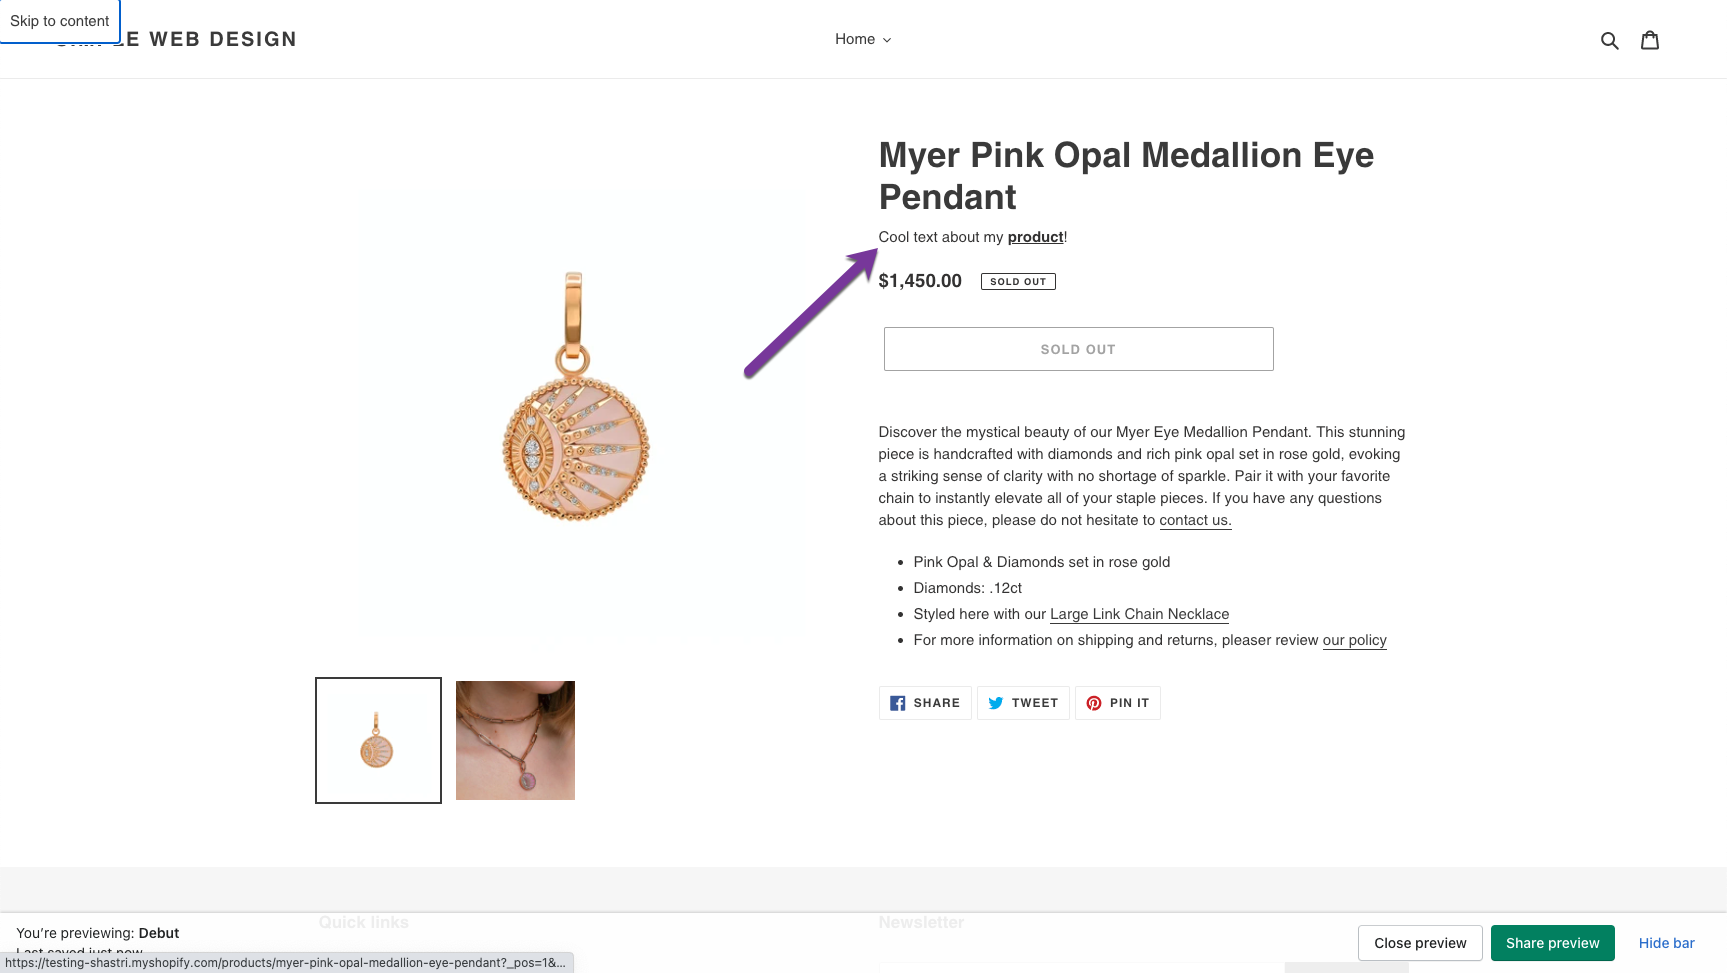
<h1 class="product-single__title">{{ product.title }}</h1>Press Enter/Return to start a new line after the </h1> and add the below code:
{{product.metafields.subheading.swd}}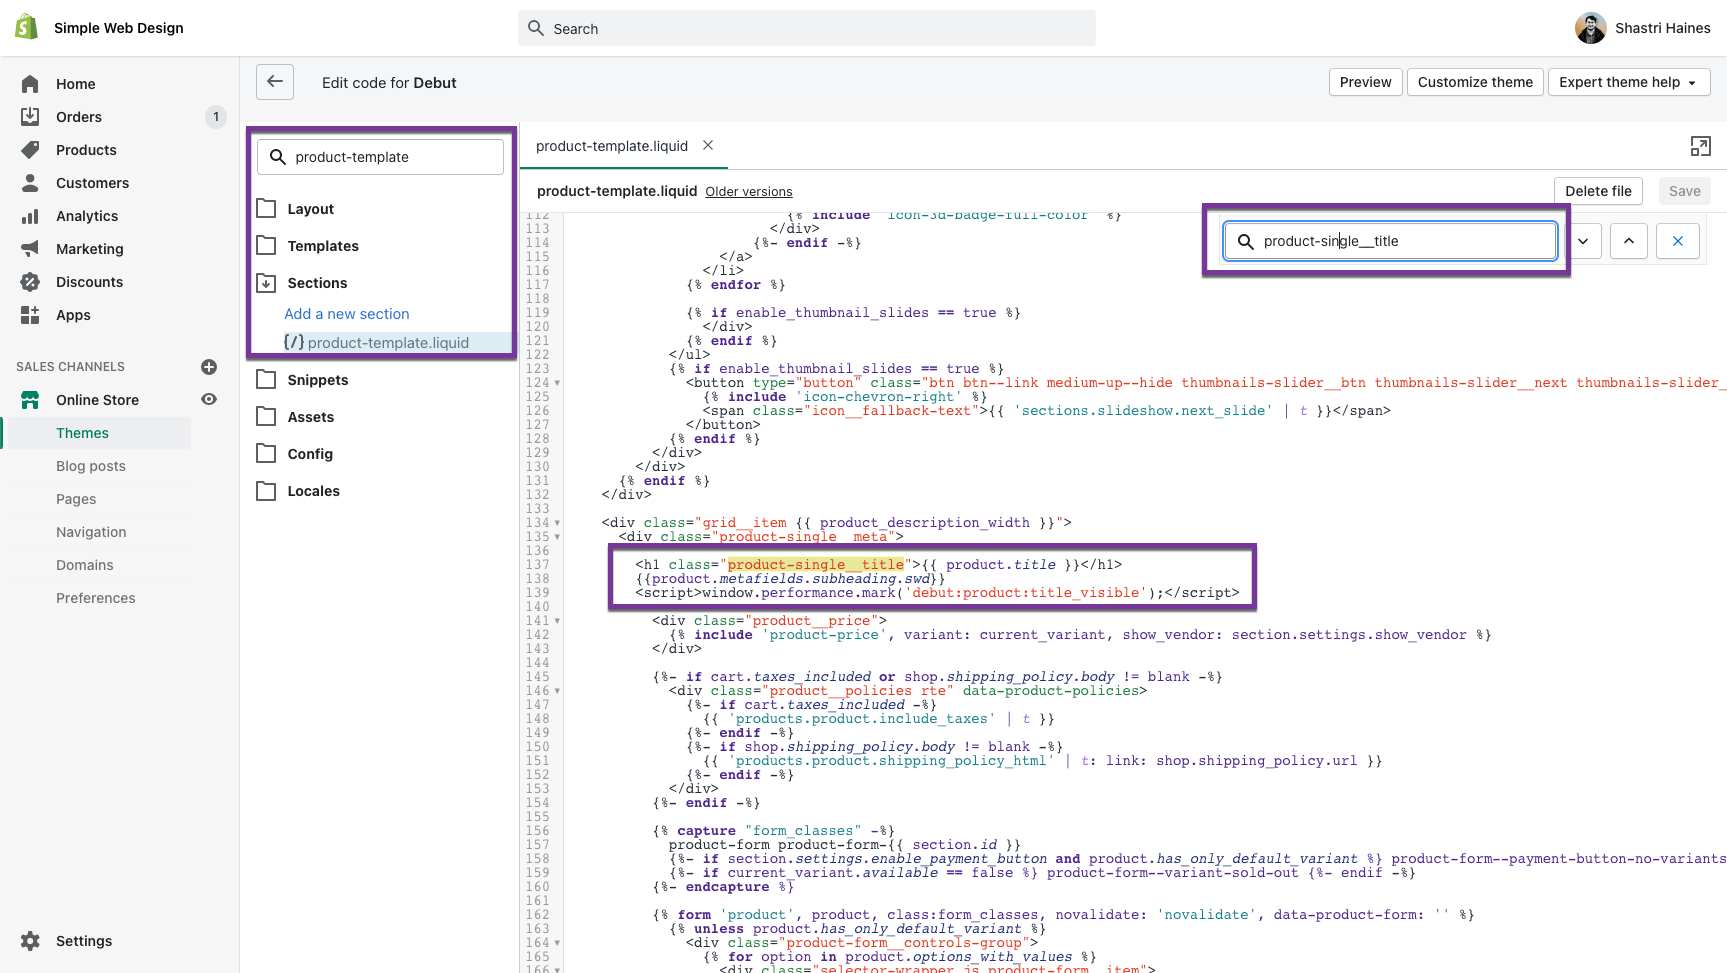
Press ‘Save’ and then we’re done. If you now go to your product page you’ll be able to see the text on the product page sitting below your title.
Other notes
You can use the editor in the metafields app to change the text to a heading if you prefer. It defaults with a paragraph tag. Alternatively, you can add a class to your code that you added before so that all subheadings feature the H2 tag, to do that add the below code instead:
<h2>{{product.metafields.subheading.swd}}</h2>
